How to Choose Colored Thermal Labels for Your Business
Choosing Colored Thermal Labels begins with understanding the job, not the color chart.
A warehouse label may face dust, friction, sunlight, moisture, or repeated scanning. A retail sticker may need stronger visual hierarchy. These conditions change the required face material, adhesive, coating, and printing method. The label should remain readable after handling. That sounds obvious. It is often overlooked.
Industry data supports careful selection. Smithers’ The Future of Labels and Labeling to 2028 reports continued expansion in global label demand, driven by logistics, retail, product identification, and regulatory information. Its analysis also highlights pressure for efficient production and more sustainable label materials. Grand View Research similarly identifies digital printing and variable-data applications as important growth areas in the labels market. Colored Thermal Labels fit this trend because they can combine fast thermal printing with visual coding, provided the color layer does not reduce barcode contrast.
GS1 guidance emphasizes consistent barcode quality, quiet zones, and reliable scanning across supply chains. Therefore, buyers should test colored backgrounds with their exact printer, ribbon settings, scanner, and application surface. Ask for samples. Test the smallest text.
A practical evaluation should compare print darkness, edge sharpness, adhesive performance, roll winding, and storage stability. Bright colors may improve recognition, but they can also weaken contrast. My own purchasing mistake was choosing appearance before scan testing. The labels looked excellent. The scanner disagreed.
This guide explains how to compare Colored Thermal Labels by application, material, color intensity, adhesive strength, printer compatibility, and total operating cost. It also considers waste, replacement frequency, and supplier consistency. The best choice is rarely the most colorful option. It is the one that remains clear, secure, and useful throughout the label’s real working life.
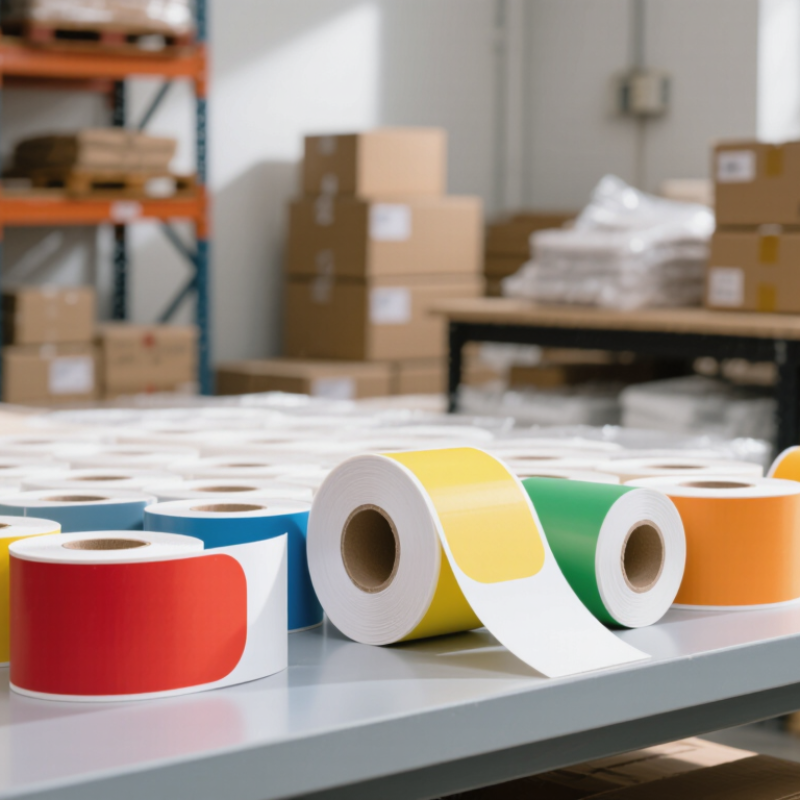
Define the Job: Direct Thermal or Thermal-Transfer Labeling
Defining the job means choosing between direct thermal and thermal-transfer labeling. Direct thermal labels react to heat from the printhead. They need no ribbon, which simplifies daily operation and reduces material changes. Colored stock can make bins, routes, or priority groups easier to identify. However, heat, sunlight, friction, and moisture can darken or weaken the printed image. A parcel left beside a warm loading door may become difficult to scan. Short-term use matters.
Thermal-transfer labels use a heated ribbon to place ink onto the label surface. With a suitable ribbon and adhesive, they can withstand storage, handling, moisture, and many cleaning conditions. They suit equipment tags, inventory labels, and products that need readable information for months or years. The process costs more and requires careful matching between ribbon, label material, and printer settings. Small errors can cause smearing, gaps, or poor contrast.
I once treated shelf life as the main test. That was too narrow. Consider temperature, rubbing, chemicals, label color, and scanning distance. Print small batches first. Rub them firmly. Expose samples to the real environment. Check them again after several days. Also confirm whether “colored label” means colored material or colored printing, because most thermal systems print one tone. A practical trial is often more reliable than a supplier specification alone.
Set Color Contrast: Target ISO/IEC 15416 Barcode Grade C or Better
Choosing colored thermal labels starts with barcode contrast, not visual appeal. The bars must remain clearly darker than the surrounding label surface. Aim for an ISO/IEC 15416 barcode grade C or better during verification. This grade indicates usable print quality across key measurements, including contrast, defects, and edge definition. A bright background with deep black bars is usually the safest combination. Pale yellow, white, or light blue backgrounds may work well when tested carefully.
Do not trust your eyes alone. Use a calibrated barcode verifier and inspect labels after actual thermal printing. Check samples at the intended print speed, darkness setting, and label size. Small changes can reduce contrast. Colored coatings, uneven surfaces, and heat-sensitive materials may also soften narrow bars. In my early testing, a label looked sharp under office lighting but produced inconsistent scans near the roll edges. The verifier exposed that weakness.
Test several color combinations, including samples stored in normal workplace conditions. Measure freshly printed labels and labels exposed to handling, warmth, or light. Keep quiet zones clean, because nearby graphics can confuse scanners. Avoid placing colored text or patterns beside the barcode. A grade C result may be acceptable, but grade B or better gives more operating margin. Recheck the barcode whenever the label stock, printer settings, or artwork changes. A reliable process is rarely permanent.
Match Printer Resolution: 203, 300, or 600 dpi to X-Dimension
Choosing colored thermal labels begins with the printer’s resolution, not the label’s appearance.
Resolution determines how precisely the printer forms each barcode module, called the X-dimension. At 203 dpi, one printed dot measures about 5 mils. This setting suits larger barcodes with wider modules, often around 10 mils or more. Fine details may look rough on small labels.
A 300 dpi printer creates dots near 3.3 mils and supports smaller, cleaner barcodes. An X-dimension around 6.7 to 10 mils often works well, but the scanner and symbology still matter. For compact medical, inventory, or shipping labels, 600 dpi offers the finest control. Its dot size is about 1.7 mils, making X-dimensions near 4 to 5 mils possible when the printer, label stock, and verifier support them. Smaller is not always better.
Test real samples before ordering thousands of colored labels. Dark blue or black print usually needs a light, even background. Bright stock colors can reduce contrast, especially under warehouse lighting. Check quiet zones, edge sharpness, and scan performance after abrasion or heat exposure. I have seen attractive labels fail because the color looked fine, but the barcode lacked contrast. That mistake is easy to repeat. Measure the narrowest barcode, convert its X-dimension into printer dots, and leave practical tolerance for calibration, print speed, and material variation. A 203 dpi printer may print a 10-mil module acceptably, yet a poorly adjusted unit can still produce inconsistent edges. Test twice.
Specify Adhesive Testing: ASTM D3330 Peel Adhesion and Temperature
How to Choose Colored Thermal Labels for Your Business
Colored thermal labels must survive handling, storage, and changing temperatures. Adhesive performance deserves more attention than color or finish. ASTM D3330 measures peel adhesion using a controlled 180-degree peel test. The result is commonly reported in N/25 mm or N/100 mm. Test panels should be clean, flat, and clearly identified. Record dwell time, peel rate, temperature, and humidity. A label that looks secure may still lift overnight.
For refrigerated goods, test at the lowest expected temperature, not only at room temperature. Many pressure-sensitive adhesive evaluations use standard conditioning near 23°C and 50% relative humidity. However, cold surfaces can reduce initial tack and increase edge lifting. For warm warehouses, add a high-temperature exposure before peeling. FINAT FTM 1 also provides an industry-recognized 180-degree peel approach for label materials. Compare results after 20 minutes and 24 hours. The difference can reveal slow bonding. ASTM D3330 is a test method, not a universal pass-or-fail limit. Your application should define its own minimum value.
Tips: Test the exact colored facestock, liner, and ink combination. Use aluminum, plastic, and corrugated samples when relevant. Measure immediately after temperature exposure. Do not rely on one test panel. Three panels are better, though more may expose variation. Document failures with photographs. I would also retest after condensation, because a dry laboratory can hide real handling problems.
References: ASTM D3330/D3330M, Standard Test Method for Peel Adhesion of Pressure-Sensitive Tape; FINAT Technical Handbook, FTM 1.
Calculate Cost per Label: Include Ribbon Yield, Waste, and Reprint Rate
Colored thermal labels can look inexpensive until ribbon usage enters the calculation.
For thermal-transfer printing, calculate cost per usable label, not cost per roll.
Use this formula: total material, labor, waste, and reprint costs divided by shipped labels.
Ribbon yield matters. Measure printed ribbon length per roll, then divide it by label pitch, including gaps.
Suppose stock costs 1.8 cents, ribbon costs 0.6 cents, and labor costs 0.2 cents per label. Add 0.3 cents for setup, trim, and spoilage. If a 6% reprint rate adds 0.16 cents, the practical cost reaches 3.06 cents per label. Small errors compound quickly across large orders.
Smithers’ 2024 study estimates the global labels market will grow from about 43.7 billion dollars in 2023 to 53.9 billion dollars by 2028. Growth increases the value of accurate costing, especially when colored stock requires extra inspection.
GS1 General Specifications also recommend verification for machine-readable symbols; failed scans can trigger hidden reprints.
Track three production runs, not one. Record unused ribbon, rejected labels, barcode failures, and color-density adjustments.
My first estimate ignored setup waste. It was optimistic. Review the spreadsheet monthly against invoices and production logs.